Getting things done, also referred to as GTD is a popular term on the internet. Most people want to be more organized and save time doing simple tasks. There is a massive amount of material and information available on the internet to help you become more efficient, and today I am going to show you my favorite GTD tool:
Many of my readers (and friends) are probably already using this service, but for those of you that are not, let me walk you through some of the basics and why I like it so much.
Google Calendar (gCal) comes free with a standard gmail account (also free). Under the hood there are several little tools that come in handy when you are trying to manage a busy social calendar (or three people’s social calendar).
Sharing: You can share your calendar with friends and family so they can see when you are available and what you are up to. This is awesome when you are trying to plan an evening out with busy people. It also helps when you are trying to figure out where the kids need to be a 6 PM tonight.
Invitations: Don’t want to share? That’s fine, you can just invite your spouse, kids, or friends to an event on your calendar and all of the information will appear on their own personal calendar.
Text Reminders: Don’t have a fancy smart phone? NO PROBLEM! You can easily set gCal to send you simple text reminders. I personally have all of my friend’s birthdays set to send a reminder a few days before their birthday so I don’t forget.
Everything in gCal is fairly simple to use and configure, but I took a few screen shots in order to show you how to share your calendar with a loved one:
STEP ONE: Go to calendar.google.com and sign in or sign up for a new account
This is the first screen you will see and you can put your mobile phone information in here so you can get your updates on the go (if you don’t have a smart phone). Add your information and follow the screens. When you are done, it will take you to the main calendar page.
STEP TWO: Go into Calendar Settings
Click on the GEAR icon and select the settings option.
When the next window opens, click on the calendar tab:
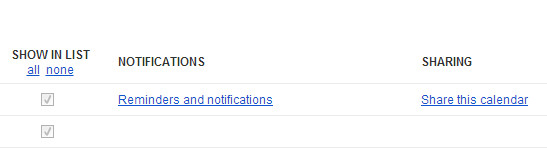
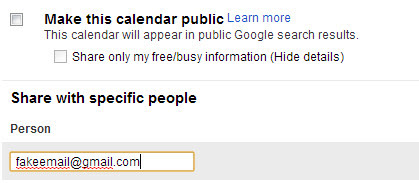
STEP THREE: Click on share this Calendar
STEP FOUR: Type the Google email of the person you want to share your calendar with (has to be another google account).
Follow the screens out and you are all set to share calendar invites with another person.
I did a video review of 3 different android-based tablets that I currently own:
Asus Nexus 7
Kindle Fire
Toshiba Thrive
My intent was to point out the positive features in each rather than expose tons of flaws. If you are in the market for a new tablet, I hope this helps you make a decision.
PS: I have been beta testing more videos on the site the last few weeks, let me know if you like the new media/content.
Earlier in the week, I told you how to have a much better social reading experience for you and your friends. While researching that article, I came across some next level techniques for more advanced users.
In this article, I will teach you how to use Tumblr to share information across all of your social media accounts. I will also discuss how to use your own custom URL shorten-er with all of these services.
A few things you need to do before we start:
You need to read the first article because I am piggy-backing off of stuff I already documented.
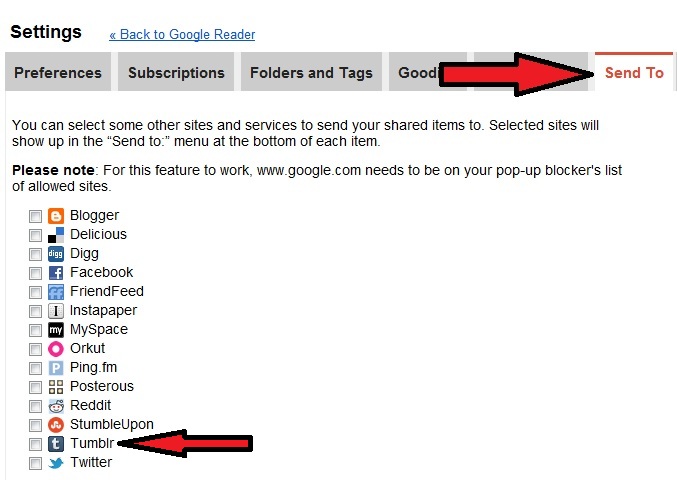
1. Add Tumblr to your share options in Google Reader:
The first article in the series covers how to set up RSS feeds in Google Reader, and the second will tell you what to click on to add various services like Twitter and Facebook. One of the other options is Tumblr. Instead of choosing Facebook or Twitter, pick Tumblr in the options (like the picture above).
Tumblr is more robust than Twitter but still designed to make simple and short posts. It is a great services that allows customization. Here is a quick tutorial on setting up an account:
As mentioned in the earlier post, at the bottom of each article in Google Reader, there will be a share button. When you click on it, the social media options you selected will appear:
When you click on Tumblr, this screen will appear:
You can mess around with more formatting or adding extra information, or you can just click on create post. The screen will wait a few seconds and then close itself.
2. Connecting to your social media accounts:
There are two ways to do this, one simple and one more complicated (but with more metrics).
Simple Method:
If you don’t have a custom URL shorten-er and you don’t care about how many clicks and shares you are getting, you can connect your Tumblr account with Facebook and Twitter:
a. Sign into your tumblr account and go to your news feed blog. Click on “Blog Settings” on the right:
b. Then scroll down to the Facebook and Twitter sections. Click on the check-boxes and then click on the buttons to link your social media accounts and follow the screen instructions:
Your posts to Tumblr (which are fed via your RSS Reader) will now post to social media accounts.
The Complicated Method:
When you create a Tumblr blog, there is a link somewhere on the page for a RSS Feed:
The RSS feed is usually your tumblr blog url with “/rss” at the end.
Example: “http://example.tumblr.com/rss”
a. Once you have your RSS feed url, go to twitterfeed and create a new feed (top right corner). Put your RSS feed in the box:
b. If you want to track your traffic or add your own custom url shorten-er, click on advanced settings in step one:
d. On this screen you can link your Facebook, Twitter, and LinkedIn accounts to Twitterfeed. As soon as you post something to Tumblr, it will automatically post that link to your social media sites. When you are done authenticating the services you want to use, click “all done”
Conclusion:
I know that was a long post, but once you get this set up, it is really easy to share information with your friends. The added benefits are that they don’t have to share any information about themselves to read your articles, you can see if your posts are actually being read, and you have a repository of all of your shared posts moving forward.