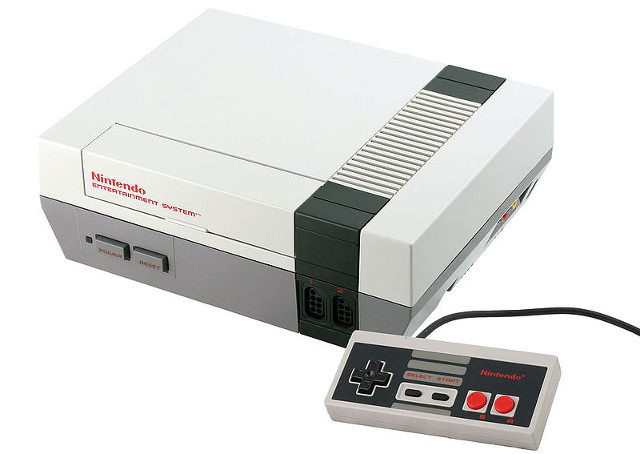
The Nintendo Classic Mini has caught the world’s attention. This retro device from Nintendo allows buyers play 30 classic Nintendo games like Super Mario, Zelda, and Metroid.
If you have a need to show your kids these classic games, you don’t have to wait until retailers get them back in stock. With a little bit of time and elbow grease, you can build your own mini game system that does much more than the limited mini (even though that thing has great hardware).
What you need:
Raspberry Pi 3B: This little computer board will power the system ($35)
A Case for RPi: I like this one – you don’t even need a screw driver ($7)
USB Gaming Controllers: This project supports PS3 controllers which are my preference, but if you want a retro feel, check these out.
What you need to do:
Lifehacker.com put together spectacular instructions on how to do this project, I cannot improve upon it. They will tell you everything you need to know. But I will provide links to the software you need.
Download the Win32DiskImager program so you can install the software on the SD Card
I built a few of these devices over the last few months, and it has become so much easier to get them set up in the most recent 4.1 version. I should also warn you – you will need a USB keyboard to help with the first configuration.
You might be asking, where do I get the games? If you search the term “Nintendo Roms” you will find places to get them. Emulator ethics states that you should own the games in their original format before downloading a copy.
I cut the cord this week and said goodbye to Comcast television and phone.
I am going to tell you how I did it and the services I am using to replace what I eliminated. But first I am going to tell you why…
People like to scream about how terrible Comcast is as a company and from a customer service perspective, but I can honestly say whenever I had a problem in the 8 years they have been in the house, they fixed it pretty quickly.
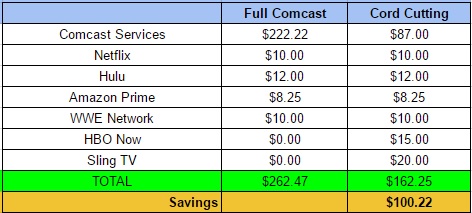
So if the service wasn’t bad, why did I cancel a bunch of stuff? I was paying $222.21 per month.
I do not live in an area where I can get another internet provider. I would be stuck with DSL, which is just unacceptable speed. I can get dish TV or something like that, but Verizon Fios isn’t an option in my area.
I had TV/internet/phone with 3 cable boxes, a cable modem ($40 in equipment rental fees), and I subscribed to the DVR service after a promotion that “saved me money”. I started with a triple play package at $99 per month and over the years it inflated to well over $200.
I called Comcast two weeks ago to negotiate and reduce my bill. They took $20 off (which was not a victory in my book), but later in the day, I found out they cut service to one of the televisions in the house. When I got it fixed, the bill went back to the starting price.
I don’t really watch much television. I would rather be reading, writing, and making stuff. My son is an avid user of Netflix and Hulu. My wife was the biggest issue as she is a content grazer and channel flipper. I walked her through my plan and she eventually got on board.
The biggest selling point: I went from $222.21 to $87(ish) per month (not including the streaming services).
Products I am using:
I decided that one clear method to save is to stop renting equipment from Comcast, including the modem. For my home and the setup that I prefer, I needed a modem, a router, and a streaming device for every television. I was thinking about buying a Ooma for phone, but my friend tipped me off to another device that I will get to later.
This this is what I purchased:
Modem: Arris Surfboard SB6183 ($97) – Part of my $87 dollars with Comcast is a faster internet, I wanted to make sure I had a modem that supported faster speeds, so I opted for the SB6183 over the SB6141.
Router: ASUS RT-AC66U ($132) – I already have one of these routers in my home, I installed a 2nd router a while ago to ensure I have great coverage throughout the house. I thought about getting Google’s On Hub, but it was more expensive and I would have to get a small switch to network all of my back office devices together. Important to note that both the router and modem support gigabit networking.
Streaming Device: Roku 4 ($133) – If you have a preference go with it. I selected the Roku 4 because it supports 4K streaming and is provider agnostic (works with Netflix, Amazon, Hulu, HBO, Google). I also like that it has an optical out to support older audio equipment that might only have HDMI pass-through.
Streaming Device: Amazon Fire TV ($85) – I could have purchased 3 Roku 4s, but I wanted to try out this device and it was on sale.
Phone Service: ObiHai 200 ($48) – My buddy Gorcka suggested this device after I expressed an interest in an Ooma. The cool thing with the ObiHai is that is connects to Google Voice/Hangouts. So instead of having to give out a new number, my house phones will ring with my Goolge number. There is a drawback to this service, you cannot dial emergency numbers. But it nice alternative to nothing and I am not even paying the $4-5 per month in taxes that you would with Ooma.
Additional Services:
As you can see in my chart above, I was already paying for Amazon, Netflix, and Hulu. Since it is April and Game of Thrones is coming back, I didn’t want to be without HBO, so I signed up for their HBO Now service for an additional $15 per month.
A service that surprised me was Sling TV. I thought it was a part of Sling Box, which lets you stream your existing TV service via equipment… Sling TV is not the same product. This is a service from Direct TV that gives you live streaming cable channels like CNN, AMC (Walking Dead) Food TV, HGTV, and Cartoon Network (20 in all).
I always joked that I would miss HGTV the most if I canceled and now I don’t have to. The service isn’t perfect, you can only watch on 1 television at a time and there is no recording service. I haven’t completely made up my mind about keeping Sling TV or HBO Now but it is nice to know I have the option.
Closing Thoughts:
The thing I want people to understand is that it costs money to get off of cable. It is a huge savings for me because I subscribed to many of the streaming services BEFORE I cancelled. That made it easier for me to make the decision (because I knew how much we were watching on normal vs. streaming).
I laid out $628 in equipment for me to feel comfortable getting off of Comcast. It is going to take 6 months for me to break even. With that said, I feel very good about my decision and it was fun setting everything up.
So far so good… I will write an update in 6 months.
Getting things done, also referred to as GTD is a popular term on the internet. Most people want to be more organized and save time doing simple tasks. There is a massive amount of material and information available on the internet to help you become more efficient, and today I am going to show you my favorite GTD tool:
Many of my readers (and friends) are probably already using this service, but for those of you that are not, let me walk you through some of the basics and why I like it so much.
Google Calendar (gCal) comes free with a standard gmail account (also free). Under the hood there are several little tools that come in handy when you are trying to manage a busy social calendar (or three people’s social calendar).
Sharing: You can share your calendar with friends and family so they can see when you are available and what you are up to. This is awesome when you are trying to plan an evening out with busy people. It also helps when you are trying to figure out where the kids need to be a 6 PM tonight.
Invitations: Don’t want to share? That’s fine, you can just invite your spouse, kids, or friends to an event on your calendar and all of the information will appear on their own personal calendar.
Text Reminders: Don’t have a fancy smart phone? NO PROBLEM! You can easily set gCal to send you simple text reminders. I personally have all of my friend’s birthdays set to send a reminder a few days before their birthday so I don’t forget.
Everything in gCal is fairly simple to use and configure, but I took a few screen shots in order to show you how to share your calendar with a loved one:
STEP ONE: Go to calendar.google.com and sign in or sign up for a new account
This is the first screen you will see and you can put your mobile phone information in here so you can get your updates on the go (if you don’t have a smart phone). Add your information and follow the screens. When you are done, it will take you to the main calendar page.
STEP TWO: Go into Calendar Settings
Click on the GEAR icon and select the settings option.
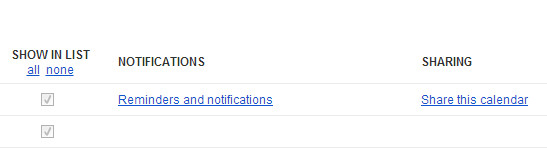
When the next window opens, click on the calendar tab:
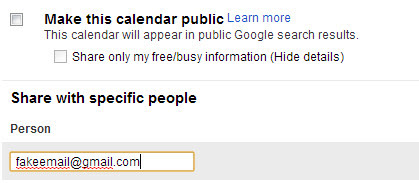
STEP THREE: Click on share this Calendar
STEP FOUR: Type the Google email of the person you want to share your calendar with (has to be another google account).
Follow the screens out and you are all set to share calendar invites with another person.
I did a video review of 3 different android-based tablets that I currently own:
Asus Nexus 7
Kindle Fire
Toshiba Thrive
My intent was to point out the positive features in each rather than expose tons of flaws. If you are in the market for a new tablet, I hope this helps you make a decision.
PS: I have been beta testing more videos on the site the last few weeks, let me know if you like the new media/content.
Earlier in the week, I told you how to have a much better social reading experience for you and your friends. While researching that article, I came across some next level techniques for more advanced users.
In this article, I will teach you how to use Tumblr to share information across all of your social media accounts. I will also discuss how to use your own custom URL shorten-er with all of these services.
A few things you need to do before we start:
You need to read the first article because I am piggy-backing off of stuff I already documented.
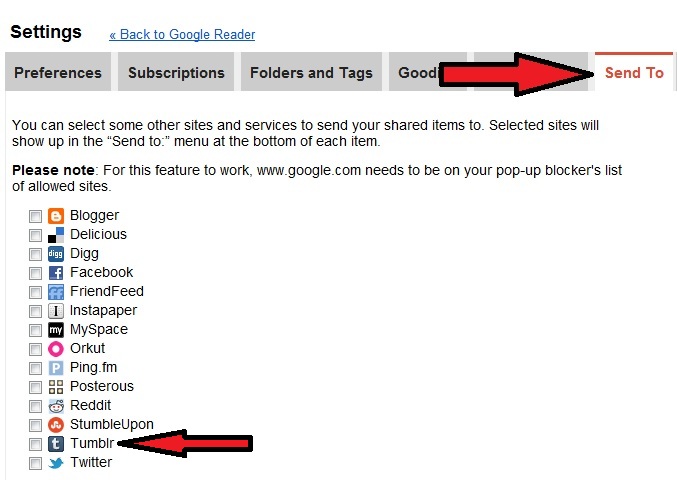
1. Add Tumblr to your share options in Google Reader:
The first article in the series covers how to set up RSS feeds in Google Reader, and the second will tell you what to click on to add various services like Twitter and Facebook. One of the other options is Tumblr. Instead of choosing Facebook or Twitter, pick Tumblr in the options (like the picture above).
Tumblr is more robust than Twitter but still designed to make simple and short posts. It is a great services that allows customization. Here is a quick tutorial on setting up an account:
As mentioned in the earlier post, at the bottom of each article in Google Reader, there will be a share button. When you click on it, the social media options you selected will appear:
When you click on Tumblr, this screen will appear:
You can mess around with more formatting or adding extra information, or you can just click on create post. The screen will wait a few seconds and then close itself.
2. Connecting to your social media accounts:
There are two ways to do this, one simple and one more complicated (but with more metrics).
Simple Method:
If you don’t have a custom URL shorten-er and you don’t care about how many clicks and shares you are getting, you can connect your Tumblr account with Facebook and Twitter:
a. Sign into your tumblr account and go to your news feed blog. Click on “Blog Settings” on the right:
b. Then scroll down to the Facebook and Twitter sections. Click on the check-boxes and then click on the buttons to link your social media accounts and follow the screen instructions:
Your posts to Tumblr (which are fed via your RSS Reader) will now post to social media accounts.
The Complicated Method:
When you create a Tumblr blog, there is a link somewhere on the page for a RSS Feed:
The RSS feed is usually your tumblr blog url with “/rss” at the end.
Example: “http://example.tumblr.com/rss”
a. Once you have your RSS feed url, go to twitterfeed and create a new feed (top right corner). Put your RSS feed in the box:
b. If you want to track your traffic or add your own custom url shorten-er, click on advanced settings in step one:
d. On this screen you can link your Facebook, Twitter, and LinkedIn accounts to Twitterfeed. As soon as you post something to Tumblr, it will automatically post that link to your social media sites. When you are done authenticating the services you want to use, click “all done”
Conclusion:
I know that was a long post, but once you get this set up, it is really easy to share information with your friends. The added benefits are that they don’t have to share any information about themselves to read your articles, you can see if your posts are actually being read, and you have a repository of all of your shared posts moving forward.