Computer Joey: Social Reading Done Right

Have you noticed your friends posting news articles on Facebook recently? Have you clicked on said news article and found yourself suddenly asked to give an application access to your personal information? And have you noticed that when you do click yes, every time you read an article about Snookie’s new underwear choices it is plastered all over your facebook wall?

If you haven’t experienced this (or don’t use facebook), good for you. If you are a facebook or social media user and have been trapped in this invasion of privacy, I have a cool alternative. It takes a few steps to set up, but once you do, I honestly think it is WAY better and more functional.

A little background: Personally, I read a ton of news articles in a given week and I like to share the best with friends and followers. I don’t flood my feeds, but there may be three or four items in a given day that I think are worthy of attention. I don’t engage my friends via facebook’s social reader, instead I use a few tools that all talk to each other. Here is how to do it.

1. Gather your news via Google Reader:

I have detailed instructions on how to set up Google Reader, so read that first (and get a gmail account if you don’t have one).

You can populate your RSS Reader with just about any popular new source (including this blog). These are the articles you will share with your audience.

2. Connect Google Reader with Twitter:

a. In Google Reader, look at the upper right corner, you will see a gear icon. Click on the icon and a “Reader Settings” option will be available:

b. At the top of the next screen, there is a tab “Send To”, click on it to select different social media accounts:

c. At this point, you have a few options. If you use both Twitter and Facebook, click on just the twitter check-box. If you only use Facebook, click on that check-box and hit the return to reader link at the top.

NOTE: If you are using only facebook, you are pretty much done. If you want to make automatic posts to both twitter and facebook, keep reading.

d. In your reader, you will now see a “Send To” option at the bottom of each post:
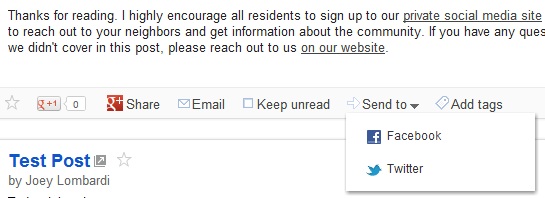

NOTE: I added both Facebook and Twitter, but if you want to use both, you only need twitter here.

e. If you click on the twitter button, a twitter box will open with your post:

You need to do one more thing to make this all work…

3. Connect your Twitter account with your Facebook Account:

a. Go to this link to sync your two accounts: https://apps.facebook.com/twitter/
b. Click on the button that takes you to your account settings.
c. At the bottom of your twitter settings, there is a button that allows you to connect the two services. Push the button and follow the on-screen prompts:

You should be all set! Now you can share posts that you read (without any requests for information via RSS). I know there is a little bit of work up front, but once you get all of this set up, it is a much better way to read, save, and share news that is important to you.

UPDATE: During the writing of this post, I may have come up with a next level method that can allow for metrics and some other custom tweaks. Check back for that post.

GooglePlus Review

( #GooglePlus, #SocialMedia )


Image Credit: Paul Vedar

Last night the good people over at Lifehacker offered invites to the new Google+ service. I jumped at the chance to get one because I have been looking at a way to do multiple people video chats for months. Skype offers it for a few bucks a month, which I was considering, but I don’t like that I have to install software to video chat when Google does it in the browser.

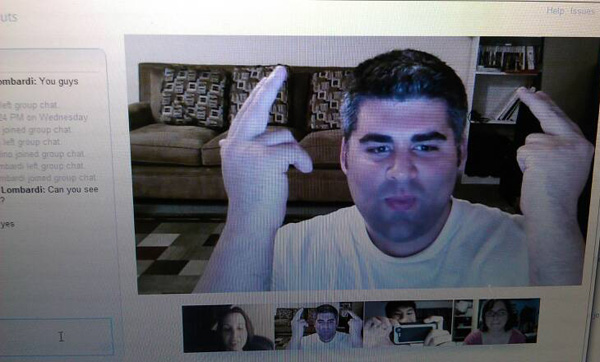
Google calls the feature “hangouts” and even in beta, it works pretty damn well. Actually checkout the Lifehacker crew’s video:

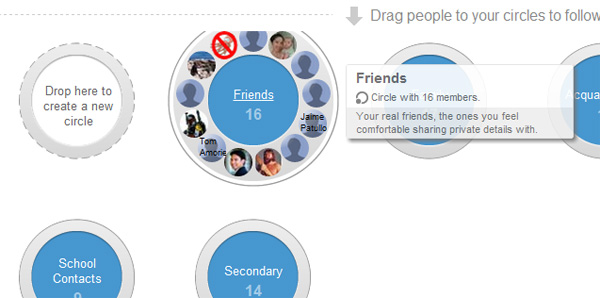
Google seems to have built this service around security and privacy. This sounds like an odd thing for Google, but it comes from the public scorn they got from rolling out Buzz (which automatically shared private info like email addresses) and also as a response to Facebook. Even though Facebook has privacy features, I feel that they always trying to get you to share more public data (and their updates always change settings to make that happen). In order to compete, Google is focusing security groups (called Circles) so you can share certain things with certain people much easier.

I am sure Big G isn’t completely saintly in this service, but since they have the Government breathing down their necks and face fierce competition with Facebook, I think the Google+ service is as legit as it can be. Since I am a google guy to start, I am hoping the service takes off because it will be much easier for me to manage my social circle with the plus service than with Facebook since I already have a hands off attitude towards it.

I was going to offer invites to readers, but it looks like Google shut down invitations already. But drop me a note, and if they turn it back on, I will try to get you in.

UPDATE: A blogger buddy (and current Keypulp founder) Joss Ross already found a security issue. Even if you choose a select group to see your post, someone could share it with everyone. Google has a fix, there is a drop down in the right corner that disables sharing. I think it should be defaulted that way, but for now, be aware and don’t share!

Computer Joey: Easy Video Conferencing

( #Skype, #GoogleTalk )

I have been meaning to do a post about video conferencing for the last 2 months but school and work have gotten in the way. With the news about Microsoft buying Skype for $8.5 billion, people are talking about the service and video conferencing in general, so I thought it would be a good time to do a tutorial.

I tried Skype a few years ago and didn’t like it. I was not into the software and I always had problems with the video; but I will accept that things have probably changed a great deal over the last three years (and I suspect Microsoft will add many new features including Xbox functionality). Video conferencing never held much appeal to me until recently: I have a few friends who don’t live close and we video conference a few times a month (or we will let the cameras run while we are watching the same movies so we can see each others reactions).

Since I don’t use Skype, the service I have been using is Google Talk. Besides a small plugin, you don’t have to install any software and works on almost any computer. Additionally, if you have a gmail account, there is no need for additional logins. While this is a really simple set up, I will still walk you through it.

Before we get started, you obviously need a gmail account, if you don’t have one, go sign up and come back.

1. In order to video conference, you need a camera. Most laptops have built in cameras, but if you don’t have one, logitech seems to be the go-to brand for all things web-conferencing. I am currently using the C510, but the C310 is a little cheaper and will work well.

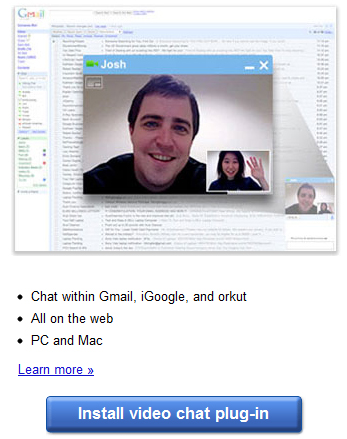
2. Once your camera is sorted out, you need to download the Google Talk Video Chat Plug-In. Click on the “Install Video Chat Plugin” button. Follow the directions based on your operating system (should only take a minute).

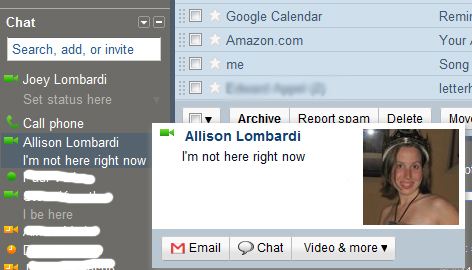
3. Once the plugin is loaded, go to gmail and log in. On the left side of the screen you will see the chat section. If you don’t have friends in your chat list, you can invite them by putting in their gmail address (in the text box shown below). If you do have friends in the chat list, look for a video camera icon next to their name – that means they have a computer that can video conference.

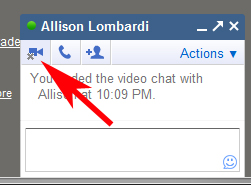
4. Click on the person’s name and a new window will pop up (usually in the bottom right corner of gmail). If the person is available for video chat, a button with a video camera will appear in the upper left corner, click on it.

5. You can now video chat:

Skype’s purchase is going to bring attention and improvements to all of the services—this is good news to consumers. I hope this tutorial was helpful and you find excellent ways to video conference. Try to stay off of Chat Roulette!

How to set up a RSS Reader

For those technically inclined, this may seem a little rudimentary, but I cannot tell you how many times I tell people “I found this article in my RSS reader and I thought you would like it” and I get a blank stare back. My motivation for this article comes from Facebook’s ever increasing privacy violations – I am prepping to get away from the service and I plan on taking everyone with me.

Personally – I don’t need Facebook. I have a website where I can publish whatever I want and control how it is viewed. I know most people don’t want to run their own websites and are perfectly content with Twitter or Facebook, but I want to make sure you can keep in touch with… me!

My own ego aside, RSS feeds are a fantastic way to read news, keep tabs on your favorite musicians, and much more. Another great feature is you can mark them as saved and go back later or even share them with friends in a variety of ways.

For this tutorial, we are going to use Google Reader. Yes, I know Google does some semi-creepy stuff with your data, but at least they don’t force you into sharing things you don’t want to (first week of Buzz aside).

INSTRUCTIONS
Update: Google retired their Reader function several years ago, I currently use Feedly as my RSS reader of choice, most of the other instructions apply.

1. You need a Google account. If you don’t have one, go to Gmail.com and sign up for a new account. If you have a Gmail account, skip to step two.

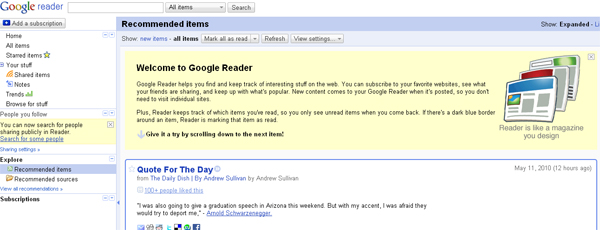
2. (Updated) Once you have signed up, go to Feedly. You will be see a welcome screen…
Note: You can use your Google account to sign in with Feedly (or you can create a separate login)

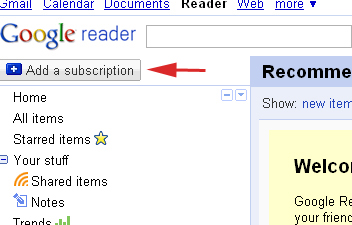
3. In the top left side of the screen, you will see a button that says “Add a subscription”. Click on that button…

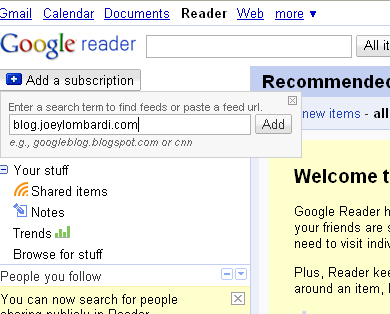
4. Type your favorite blog or website and then click the add button (SHAMELESS PLUG ALERT!)

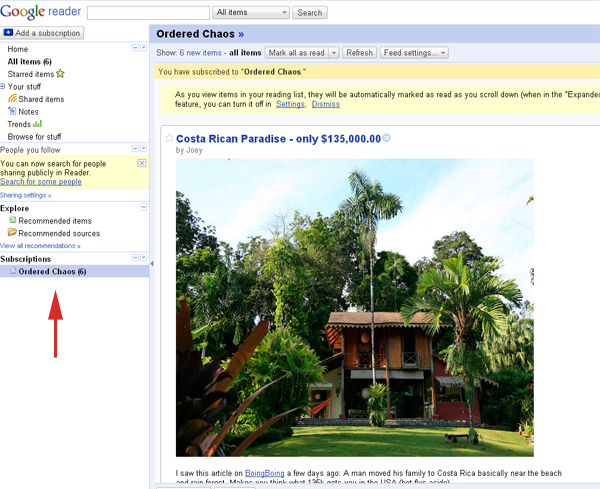
5. You will see that once you hit add, the blog or website will be added to your “Subscriptions” section

As you read through the posts, the RSS reader will mark that selection as read and the number of unread items highlighted in bold will decline.

6. By default, Google Reader shows all items in your RSS feed all the time. You can change that setting in the upper area of the article window. By clicking on “Show: New Items” the reader will only display new posts. This can be changed back and forth at any time.

7. At the bottom of each article, there is a control panel that will allow you to star, share, email, and do other things with the post. You can look at your starred items in the left side control panel, there is a “Starred Items” Folder (the same goes for shared items)

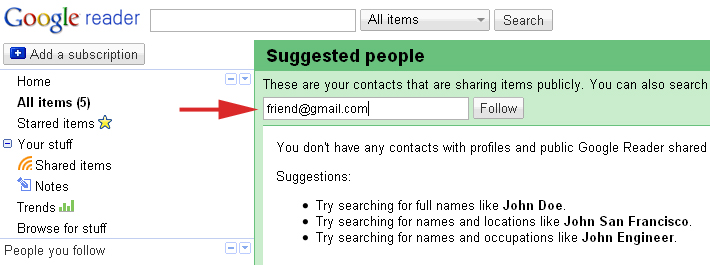
8. If you look at the left side control panel, you will see “People that you follow”. Click on “Search for some people”. This will take you to a screen where you can put in your friends Gmail addresses and be able to easily see what they are sharing and visa-versa.

That takes us through the basics of setting up RSS feeds. Have fun finding sites to add to your reader.

Before I go – one last hint. Several websites like LifeHacker and even the New York Times have different RSS feeds formatted in different ways. Some sites only give you the headline of the article, other sites give you the full article. Most sites offer both, but you will have to find the link to the full feed. Don’t get frustrated, you should see an RSS feed icon that looks like this:

That should give you the link to the properly formatted RSS feed. But give it a try, you will get the hang of it very quickly.

Email Best Practices

I have come to realize that a good portion of my life has centered around email. When I got out of college I was assigned to the email support team of my company and quickly became the one stop shop for 40,000 employees email accounts, I did that for four years. I also started a small computer repair shop/consulting firm during that time and did a good deal of small business email configurations. During my time as “Computer Joey” (that was my business’ name if you didn’t figure it out) I also had a chance to talk at schools about technology and how to be safe on the internet. Those talks came to mind when I was building a contact list for my homeowners association. Long story short, I think it would be helpful to list some pointers about incorporating email into your life:

  1. In your email address, refrain from putting any personal information (besides your name) before the “@” sign. Examples of this are: Your birthday (JohnDoe01051975@yahoo.com), your home address number (NancyDoe80@yahoo.com), Any part of your social security number, Don’t include your zip code, don’t include your age, etc.
  2. If you are still in the work force, try to avoid using “cute” email address names like “SweetSk8rgurl@yahoo.com”. If you lose your job you don’t want to put an email address like that on your resume, and checking multiple accounts can get tiresome. On the flip side, if you are retired or close to it you might want to avoid putting hobbies into your email address. Example: “Mustanglover40@hotmail.com” could make you an easy target for an internet scammer. They might find an in by sending you an email about Mustangs or classic cars.
  3. Try to avoid using the email account that your internet service provider’s (Comcast, Verizon) gives you. If all of your friends know your email address is John.Doe@comcast.net and you decide to change service providers, you will lose that address and your friends might not be able to find you. I suggest signing up for a free account at Yahoo, Gmail, or Hotmail. They provide a huge amount of space for free and those accounts tie into to other great free services. My personal recommendation is Gmail but you should check them all out to see what you like best.
  4. Try to avoid forwarding chain letters. If you don’t know what a chain letter is, basically any email that asks you to forward to all of your friends is a chain letter and spammers can use those chain letters to get your email address.
  5. On that note, whenever you are sending out an email to a large group of people, use the BCC feature (BCC = Blind Carbon Copy). There is always somebody in the group who decides to Reply to All and the next thing you know your inbox is full with generic responses, this will eliminate that problem.
  6. You should not use company email for personal use. You can’t control your friends from emailing you something you should not get at work, don’t put yourself in that situation. I would also suggest that students leave their school accounts for school only (it is an easy way to find someone).
  7. Don’t say anything in email that you would not say to anyone’s face. It is easy to form a sense of detachment when you are sitting in front of a computer, remember there is a human being that is going to read that email.

I think that is good for now. Good luck out there on the internet and try to be safe.

Other Useful Email Tips:

IRS Refund Checker

Here is a quick and helpful post:

I have been wondering where my federal tax return was, so I called my cousin Anthony who is an accountant if there is a place to check. My man rocked my mind with this site:

IRS Refund Checker

This is the real deal directly from the IRS and you can find out when your money is coming in 2 seconds.

You need to know EXACTLY how much is due back to you, but besides that, great tool.

Good luck and THANKS ANTHONY!

(If you use this, Thank Anthony in the comments!)